

 EGPT
EGPTTable of Contents
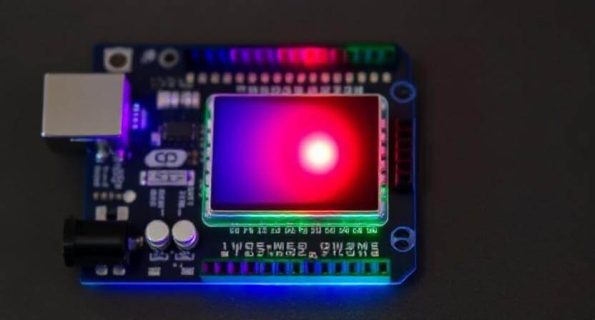
Introduction: Why the Arduino Color Sensor Is a Game-Changer
Depending on the type of your device, it consists of photo capture options with sensors and processors of different types that allow them to identify colors. It can all be attributed to the efficiency of the Arduino color sensor. This small and reasonable-priced sensor is ideal for a beginner who wants to laz into the coding world as well as for a professional coder who needs yet another tool to add to his or her pile of toys.
In this part of the blog, we shall be unveiling a number of insights on the Arduino color sensor that will be of interest to those who will be reading this blog. Stay with me, and I shall also explain why this tool has turned into an indispensable asset of the makers as well as engineers.
What Exactly Is an Arduino Color Sensor?
First, let’s break it down. The Arduino color sensor is a module that can easily sense colors in the surrounding and convey that data in a format that is readable by the Arduino board. It is fun; it entails the use of sensors combined with the expertise of using the Arduino platform.
In as much as we talk of the color detection sensor Arduino we are referring to a sensor is an electronic device that can distinguish colours based on amount of light absorbed. For example, with the help of technologies it can identify between colors such as red, green and blue. This opens up a whole new world of possibilities for your projects.

How the Arduino Color Sensor Works
Now let me explain in detail as to how the Arduino color sensor is designed and functions. At the center, it contains an RGB light sensing mechanism as its key part. The pencil-type shines through red, green and blue light onto the object. Thus, it estimates the amount of light that has been bounced back then calculates the colour of the object from these values.
For instance, if an object is red, then the sensor will receive more reflected red color and will indicate it. The beauty is in its efficiency and speed – so much so that the library performs very well in real time.
The best part? It is easily connectable to an Arduino board and through basic coding you can integrate a series of commands that would perform various actions depending on the color it has identified.
How to Use an Arduino Color Sensor in Your Projects
If you’re asking yourself right now on how you can start, relax, you are at the right place. So, in this particular article, I will guide the readers step by step on how to use this color sensor with arduino.
Step 1: Gather the Materials
- Arduino Uno (or any compatible board)
- TCS3200 Color Sensor (one of the most popular choices)
- Jumper wires
- Breadboard (optional)
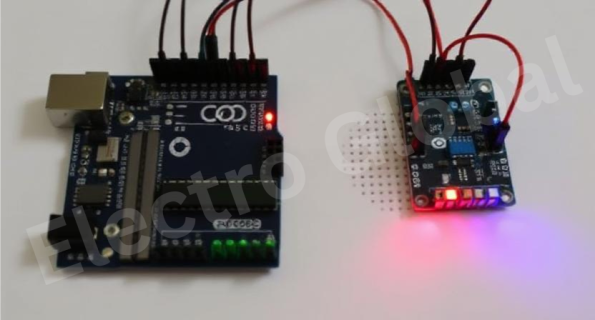
Step 2: Wiring the Sensor
First, make necessary connections of this color detection sensor Arduino via using several junction wires. Here are the requirements between the important slots:
- VCC → 5V on Arduino
- GND → GND on Arduino
- OUT → A pin (e.g., A0)
- These include S0, S1, S2, S3 pins (these are used to set the parameter of the sensor).
Step 3: Upload the Code
Here is a typical piece of code that can be used to start with colour sensor arduino:
This code reads the raw color data from the sensor and displays it in your Serial Monitor. Simple enough, right?
Applications of Arduino Color Sensors
When you familiarise yourself with the color sensor of the Arduino board then the choice is really yours. Here are some creative application that one can try:
Smart Sorting System: construct an automated system to categorise objects based on the colors. Good for use in automation and robotics related projects.
Lighting Responsive to Color: Write a code that shall control the Arduino to record the color sensed by the sensor and light up the LED strip in that particular color.
Sequential Illumination: Create displays that light up in different sequences so as to allow the user to control the flow or make it be changed by certain conditions.
Obstacle detection in Robotics: Employ an array to sense the color of objects on the path of a Robot and be in a position to make a decision such as halting, turning among others.

Overcoming Common Issues with Arduino Color Sensors
All things considered, the Arduino color sensor is quite accurate, yet there may be some issues that you could encounter; particularly if this is your first time using this gadget. Let’s troubleshoot some common problems:
Low Sensitivity: Less sensitivity or failures of picking up colors may be due to low power supply to the sensor’s circuit. A weak signal can cause fluctuation in conductivity and hence makes the readings on the meter vary.
Light Interference: This interferences maybe caused by the light in the surrounding environment. It will be advisable to use the sensor in areas that have minimal or standard levels of illumination in order to get the best results.
Calibration: Colour sensors may need some level of calibration so as to operate to the optimum level. Ensure you set your image processor in correct manner according to the equipment you are using.

Application of Color Sensor Code Arduino: Further Use
After this, try adjusting the advanced programs for more desirably output in the functioning of the sensor.
For example, it is easy to make a color sensor circuit using Arduino through which you can control your project according to the color perceiving by it. Here’s an example:
This piece of code is rather concise and is aimed at identifying dominant colors or performing some actions in case of their existence. This logic can be used in many fantastic and interesting projects.
Conclusion: Why the Arduino Color Sensor Is Essential for Your Projects
You should also be equipped with sufficient information about the Arduino color sensor, its functionality and applications in IT projects. There is no doubt that this little device is one of the most useful tools that every maker and developer can use, and the creativity can go on forever as soon as one starts trying to use it.
Starting from the color-responsive systems and extending to making your robots smarter, the color detection sensor Arduino is a worthwhile device to have. It can be useful for both novice and experienced users – the possibilities of the sensor seem to be virtually unlimited.
So, what are you waiting for? Nowadays we have tried out experimenting with the Arduino color sensor and let your imaginations run wild and give life to your creations!
Frequently Asked Questions
How to use color sensor with Arduino?
To use a color sensor with Arduino, like the TCS3200 or TCS34725, start by connecting it to the appropriate digital and power pins. Load the sensor’s library in your Arduino IDE and use it to read RGB values. These values will change based on the color placed in front of the sensor, allowing your Arduino to differentiate between colors effectively.
How to connect color proximity sensor to Arduino?
Connecting a color proximity sensor like APDS-9960 to Arduino involves wiring the I2C pins (SDA & SCL) along with VCC and GND. You’ll also need to include the proper sensor library (such as Adafruit’s) in your sketch. Once connected, you can read color and proximity data using the sensor’s built-in methods, enabling gesture control or object detection features.
How to interface color sensor with Arduino?
To interface a color sensor with Arduino, connect the sensor’s signal, power, and ground pins to the respective Arduino pins. Load the sensor’s library and run a basic example sketch to verify functionality. You’ll receive RGB or frequency data from the sensor, which can be processed to detect the color of an object in front of it.
How to interface color sensor with Arduino in steps?
1️⃣ Choose a color sensor (like TCS3200).
2️⃣ Connect VCC, GND, S0–S4, and OUT pins to the Arduino.
3️⃣ Install any required libraries (if using TCS34725 or similar).
4️⃣ Use a basic sketch to read color values.
5️⃣ Map the RGB or frequency values to specific colors based on calibration.
These steps will help you start detecting colors accurately in your projects.
How to sense only one color from RGB sensor Arduino?
To sense only one color using an RGB sensor with Arduino, you’ll read the RGB values and apply threshold conditions. For example, to detect only red, check if the red value is significantly higher than green and blue. You can write conditional statements in your sketch to trigger actions only when a specific color is sensed.