Raspberry Pi Pico Battery Guide Featuring 3000mAh LiPo Battery Insights
Explore the best 3000mAh LiPo battery options including 3.7 V and 12V variants for Raspberry Pi Pico. Enhance your portable electronics with expert tips. Learn more!
June 2026By ElectroGlobal Team10 min readSEO
Table of Contents
Choosing the Right 3000mAh LiPo Battery for Raspberry Pi Pico Projects
Safe Charging and Management of 3.7V LiPo Batteries Including 2000mAh and 10000mAh
Using 12V LiPo Batteries with Raspberry Pi Pico: Voltage Conversion and Safety
Integrating LiPo Batteries with Raspberry Pi Pico: PCB Design and Runtime Optimization
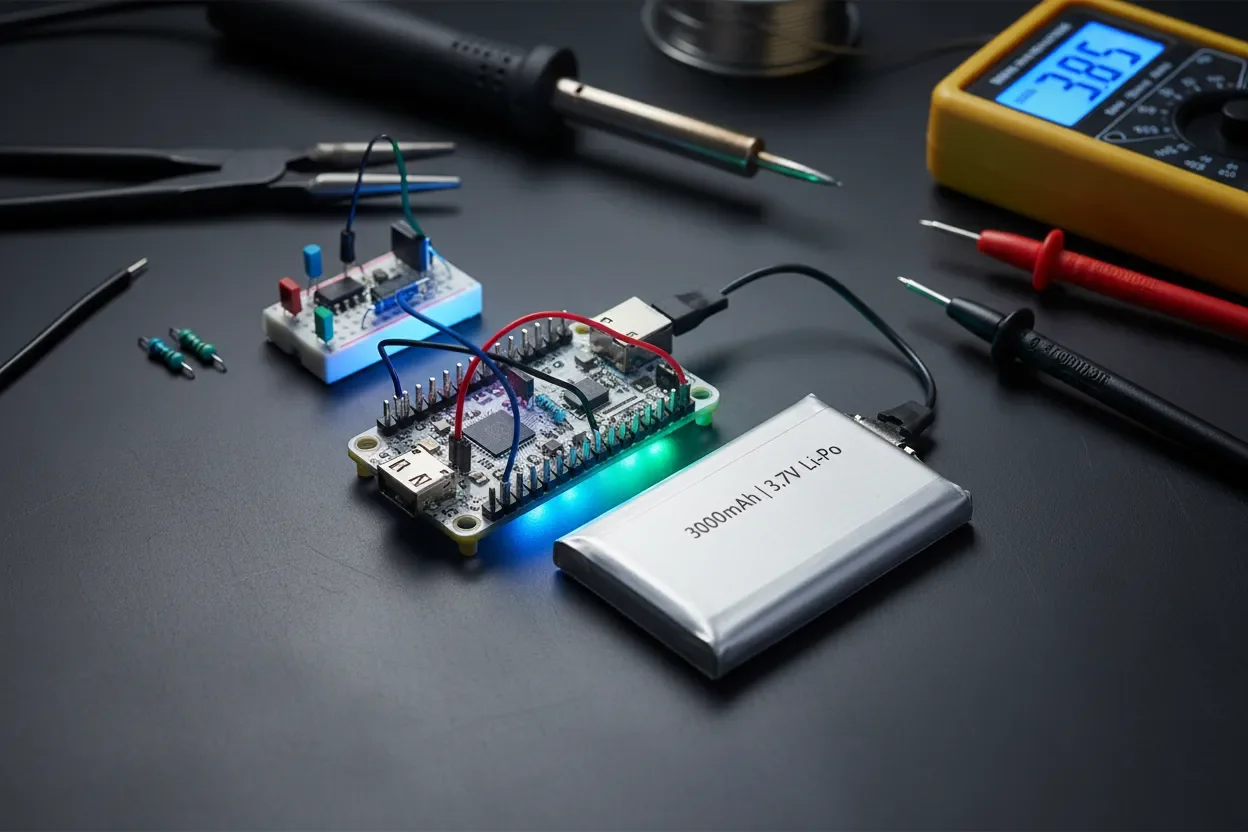
Running your Raspberry Pi Pico on a 3000mah lipo battery is a solid hack for any portable build. Let’s clear up what you get: how long your Pico runs on a 3.7V 3000mAh cell, whether to pick something like a 3.7 v lipo battery 2000mah or huge 3.7 v 10000mah lipo battery, and the basics for charging and keeping your hardware safe. If you want long battery life, compact size, and reliable power, you’re in the right place.
LiPo batteries totally changed the game for embedded and portable electronics. The 3.7 v lipo battery is basically standard for Raspberry Pi Pico builds now. Around India, engineers and tinkerers usually grab cells from 1000mAh up to 10000mAh, all depending on how long they need to run and how much weight they can carry. A recent market survey found over 70% of new IoT prototypes in 2025 used LiPo packs from 2000mAh to 4000mAh. Clearly, LiPo is the top choice in this space.
This article is here to help you out with:
Picking a battery with the right size (mAh) for your project’s runtime.
Understanding when to go for 3.7V, 12V, or a monster high-capacity LiPo pack.
Charging your battery right and adding basic protection for safety.
Simple PCB tips for steady, clean power—no brownouts, no drama.
Key Takeaways
Stick to 3.7V LiPo batteries from 1000 to 5000mAh for solid power and portability with the Pico.
Always run your Pico through a voltage regulator or buck converter when using 3.7V or 12V LiPo packs.
Charge LiPos at safe rates (0.5C–1C) and use batteries with protection circuits, especially for big capacities.
Pico doesn’t have built-in BMS—add one externally for monitoring voltage, current, and battery health.
Choose LiPo packs with low ESR and built-in protection PCBs to avoid voltage drops and safety issues.
Good PCB layout (bypass caps, short battery routes) really helps stability and battery lifespan.
Choosing the Right 3000mah lipo battery for Raspberry Pi Pico Projects
3.7V LiPo Battery Selection Power Capacity
Understanding 3.7V LiPo battery Specifications and Capacity
Pico runs best with a nice, steady 3.3V, so a 3.7V LiPo battery is perfect. The voltage lands right in the Pico’s safe zone (1.8V–5.5V). A 3000mAh 3.7V LiPo gives you about 11.1 watt-hours. If your Pico draws 100mA on average (pretty typical with a few sensors attached), you’re good for around 30 hours on a single charge.
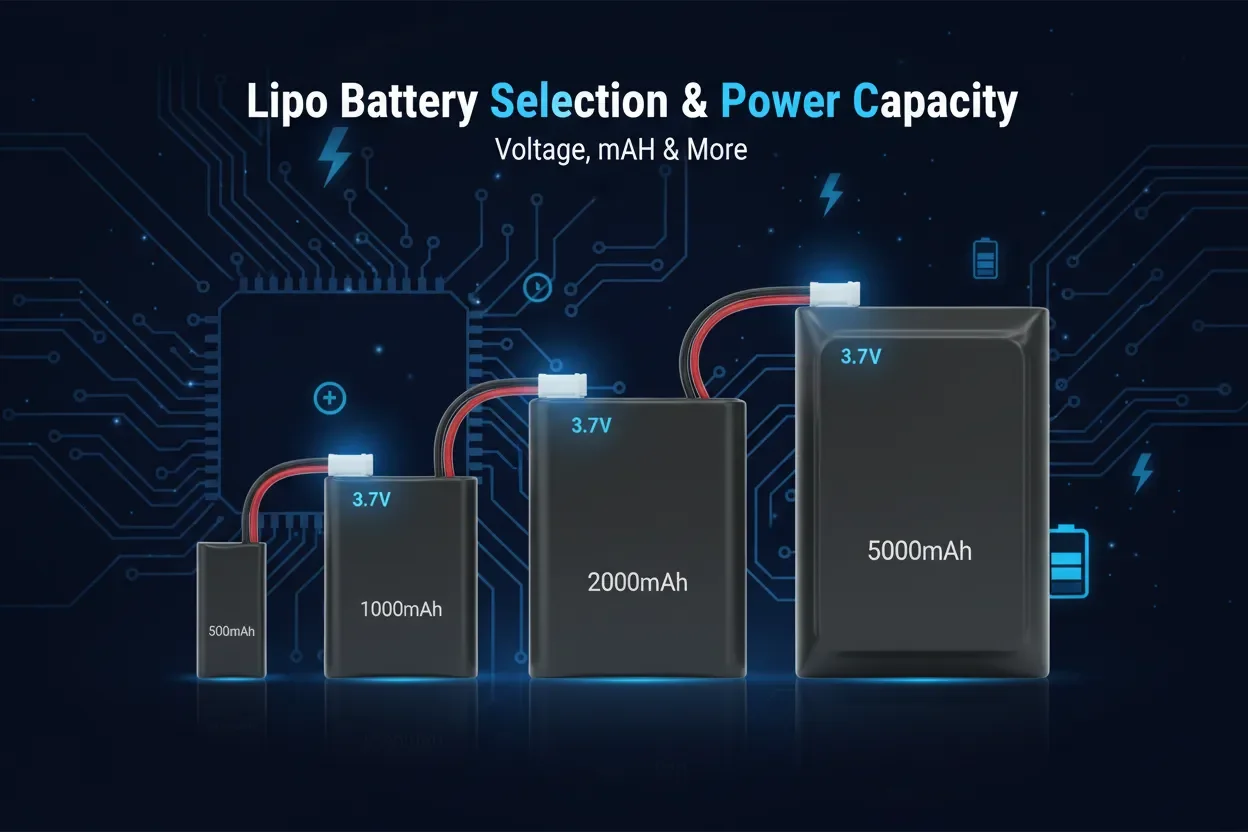
Now, a 3.7 v lipo battery 2000mah runs 20ish hours—less, but lighter and smaller, so great for tight spaces or wearable builds. A 3.7 v 10000mah lipo battery powers your project way longer (up to 100 hours!), but is bigger and heavier. The “C” rating is about safe max current. For a 3000mAh 1C cell, that’s 3A—way more than the Pico will ever need.
Expert Tip: Don’t ignore the datasheet. Always check the charging/discharging C-rates and internal resistance. Lower ESR (below 100mΩ) means your Pico gets stable voltage even under a sudden load.
Comparing 3000mAh vs 2000mAh and 10000mAh Batteries for Runtime and Portability
Trying to decide which capacity to buy? Here’s the no-nonsense summary: a 3.7V 2000mAh cell powers simple logger projects or trackers for roughly 20 hours. Go up to 3000mAh, get about 30 hours—at the cost of a little extra weight (about 50–75g).
Step up to a 3.7V 10000mAh LiPo and you can run for days—though at almost 200 grams, it’s not exactly pocket-friendly. In India, you'll see 2000mAh cells in wearables or small sensor nodes, 3000mAh in field data loggers, and big 10000mAh packs for serious, multi-day fieldwork. Always match your battery to your project’s runtime AND available space.
Battery Nominal Voltage Capacity Estimated Pico Runtime* Physical Size 3.7V 1000mAh 3.7V 1Ah ~10 hours Very compact 3.7V 2000mAh 3.7V 2Ah 20–22 hours Compact 3.7V 3000mAh 3.7V 3Ah 30–35 hours Medium 3.7V 10000mAh 3.7V 10Ah >100 hours Large, heavy
*Estimated runtime at a constant 100mA load without voltage conversion losses.
For example, lots of engineers in India just pick up 3.7 v lipo battery 2000mah from local shops and get a full day out of a remote Pico sensor project. Bottom line: Know your runtime, know your space limits, and choose what fits both.
Safe Charging and Management of 3.7 v lipo battery Including 2000mAh and 10000mAh
LiPo ChargingBattery ManagementSafety
Essential Charging Techniques and Circuitry for LiPo Batteries
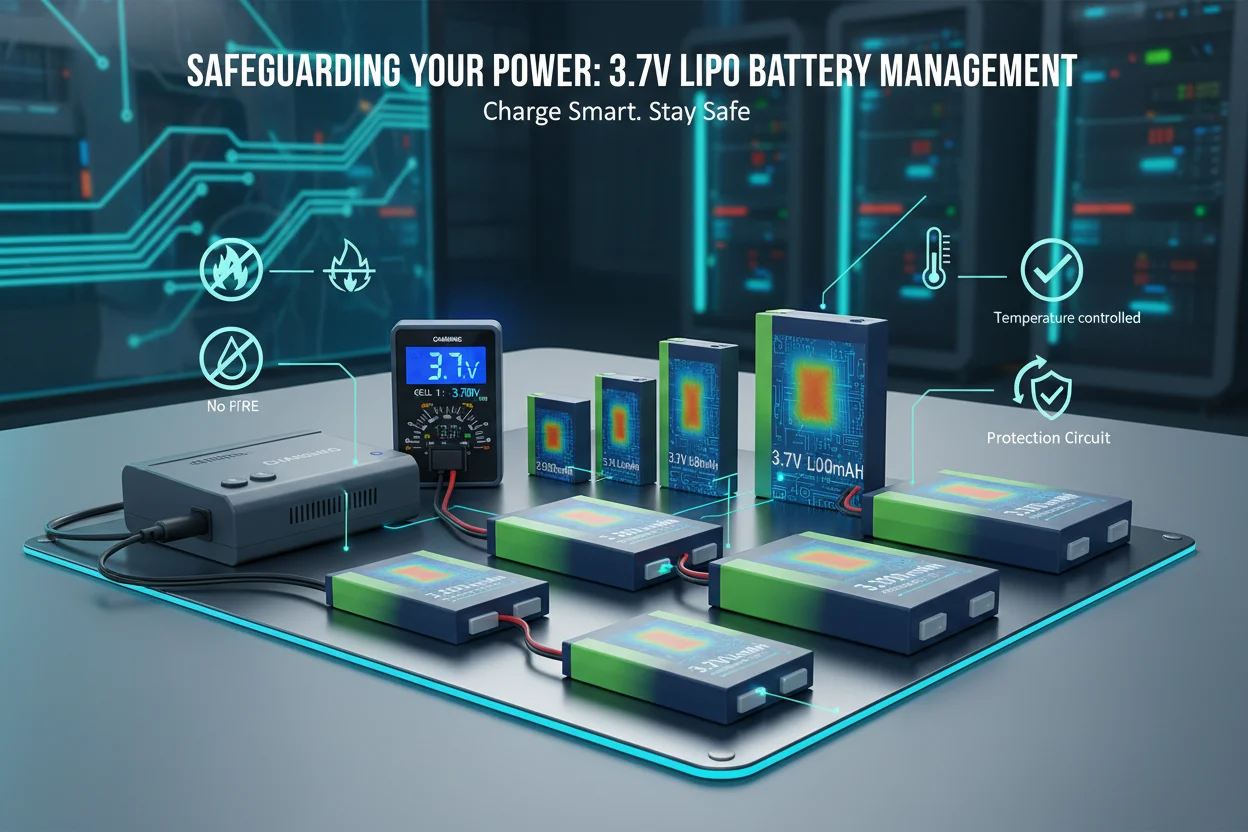
Always charge LiPo batteries the right way—constant-current/constant-voltage. For a 2000mAh cell, that’s a 1A max charge; for 3000mAh, stay under 1.5A. Grab a TP4056 module or similar charger IC; they’re easy to find online or at local shops. Never skip the battery protection IC. It protects from overcharge, over-discharge, and accidental shorts—must-haves for safety.
Stick to charging at 4.2V max and never let any cell drop under 3.0V. Ignore that and you risk swelling or even fire. For big packs like a 3.7V 10000mAh LiPo, go for a charger with balancing and dedicated cell monitoring. Here’s a classic single-cell charging hook-up:
// TP4056-based LiPo charger connection BAT+ ---- [TP4056 IN+] ---- 5V USB Power BAT- ---- [TP4056 IN-] ---- GND OUT+ ---- Battery Positive Terminal (to Pico regulator) OUT- ---- Battery Ground // Ensure protection circuits or use cell with BMS
Implementing Battery Management Systems for Raspberry Pi Pico
The Raspberry Pi Pico doesn’t come with any battery protection onboard. Always use a LiPo with a built-in PCM (protection circuit module) or add an external BMS. For more serious builds, try a fuel gauge IC like the MAX17048 to check voltage and track battery life. It’s a lifesaver—your code can warn you before battery shutdown, keeping both the battery and project healthy.
LiPo Safety Checklist for Pico Projects
Stick to charger modules that match your battery’s capacity and proper charge rates.
Pick LiPo cells with built-in BMS or add your own external protection module.
Use your Pico’s ADC or a fuel gauge IC to keep an eye on voltage in real time.
Program your gear to disconnect or alert when voltage nears 3.2V/cell—this saves your battery’s life.
Always connect and disconnect batteries with your Pico system powered off to prevent any nasty current spikes.
Take this example: One Bangalore robotics team runs 3.7V 10000mAh LiPo batteries with smart BMS. Their gear runs for days and never gets over-discharged, thanks to automatic system shutdowns. Worth remembering: Safe charging equals safe, long-lived batteries.
Using 12v lipo battery with Raspberry Pi Pico: Voltage Conversion and Safety
12V LiPoVoltage RegulationPower Safety
Understanding 12V LiPo Battery Packs and Their Applications
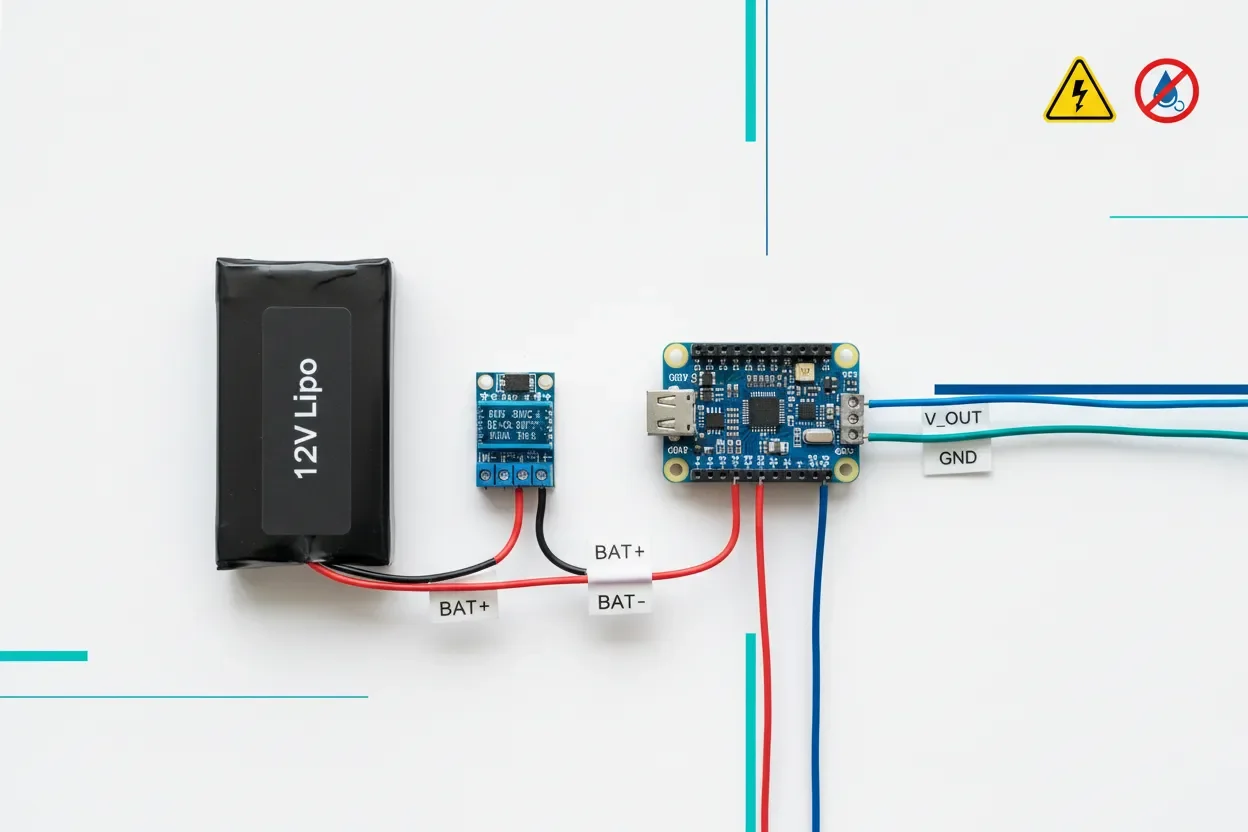
Sometimes, projects need a 12V LiPo battery—these are made by wiring three 3.7V cells in series to get a nominal 11.1V. You’ll see these batteries in robots and edge devices with motors. Don’t ever plug 12V straight into the Pico; it’ll fry instantly. Always step down the voltage first.
Common 12V LiPo packs come in sizes like 1500mAh, 2200mAh, and even 6000mAh—handy for robotics projects. While the Pico just sips power, these packs handle your motors, big radios, or lights too. It’s a nice way to power your whole robot from one big battery.
Expert Tip: Add a TVS diode on your step-down converter’s input. It’s extra protection against voltage spikes from motors or sudden loads. Don’t skip it for robotics!
Voltage Regulation for Safe Raspberry Pi Pico Operation
Never wire a 12V LiPo battery directly to the Pico. Always use a buck converter to step down to 3.3V. Typical converters run at about 85% efficiency, so total runtime will be a bit less than just dividing up battery watt-hours. For example, a 12V 2200mAh pack (26.4Wh) might last you 22 hours powering a Pico and sensors, after accounting for conversion losses.
Put ceramic caps at both input and output of your buck converter and right at the Pico’s supply pins. This knocks out noise and voltage spikes. Keep your high-current traces short and thick; separate logic and power grounds for stability. In Pune and elsewhere, robot builders routinely use this setup: one 12V LiPo battery for everything, with a step-down for the Pico.
Bottom line: If you need a 12V lipo battery for motors, just add a quality buck converter for safe Pico power. You won’t regret playing it safe.
Integrating LiPo batteries with Raspberry Pi Pico: PCB Design and Runtime Optimization
PCB Design Runtime Optimization Battery Health
Best Practices for PCB Power Delivery Using LiPo Batteries
Clean, steady power starts at the PCB. Always put ceramic bypass caps (10uF or so) right next to the Pico’s 3.3V and GND pins. That’ll smooth out any sudden dips when your code hits the radio, sensors, or screen.
Route your battery wires short and use proper copper width (min 1mm for up to 2A loads). Connect power and logic grounds at a single point—prevents noisy interference. For connectors, locking ones are worth it—they don’t fall out if you jar the device. Worth remembering: A thoughtful PCB saves headaches later.
// Example Pico + LiPo PCB snippet C3: 10uF/6.3V ceramic (bypass @ Pico 3.3V) // Place near MCU: // [LiPo Battery]----[Step-down Regulator]----[C3]---[Pico VCC]
Maximizing Runtime and Battery Health in Raspberry Pi Pico Systems
Want the battery to last as long as possible? Stick to proper charge/discharge rates—don’t fast charge unless your cell is rated for it. Never pull more current than the C-rate allows. If you’re parking your project for a while, store your battery at about half-charge (3.8V per cell).
Packs from 1000mAh to 5000mAh hit the sweet spot for most builds—good balance between size and run time. In Hyderabad, Pico makers easily get 30+ hours from a 3000mAh LiPo, just by following best layout and charging practices. Bottom line: Smart charging and layout give you both safety and long battery life.
Frequently Asked Questions
What is a 3000mAh LiPo battery, and why use it for Raspberry Pi Pico?
It’s a battery that stores 3 amp-hours of charge at 3.7V. For Pico, it means you get about 30 hours of solid runtime. That’s perfect for field data loggers, IoT, or any project where you don’t want to recharge every night.
How does a 3.7V LiPo battery 2000mAh compare to a 3000mAh cell?
The 2000mAh version is lighter and more compact—runtime drops to about 20 hours. It’s great for wearables or small enclosures. If you need maximum portability, go 2000mAh. For longer runs, pick 3000mAh.
Can I directly connect a 3.7V LiPo to the Pico?
Yes, but regulate the voltage down to 3.3V for best stability. Pico handles 1.8V–5.5V, but using a buck or LDO gives you steady power as the LiPo voltage drops during use. Direct connection works short term, but not recommended for battery longevity.
How do I safely charge a LiPo battery for my embedded project?
Use a proper charging module (like the TP4056) that does CC/CV charging. Never go above 1C for your battery—so 2A max for 2000mAh, 3A max for 3000mAh. Going too fast heats up your battery and kills lifespan.
Which is better: 3.7V 10000mAh LiPo battery or multiple smaller packs?
10000mAh packs last ages, but are heavy and harder to fit in small cases. Multiple smaller ones are safer for prototyping—you can swap, parallel, or replace as needed. Just make sure to balance charges if wiring in parallel.
What if my project needs 12V for robotics—how do I power the Pico?
Get a 12V LiPo battery for motors and big stuff. Use a buck converter to drop that down to 3.3V for your Pico. Never plug 12V in directly—it’ll fry your board instantly!
Are battery protection circuits required for all LiPo batteries?
Absolutely. Protection circuits prevent overcharge, deep discharge, and shorts. Always use a battery with built-in PCM/BMS or add your own. It keeps your project and workspace safe.
How do I estimate the actual runtime of my Pico project on a chosen battery?
Easy: Find battery watt-hours (mAh × volts ÷ 1000), multiply by regulator efficiency, and divide by your Pico’s load power. For example, 3000mAh × 3.7V = 11.1Wh. Pico draws 330mW? Expect 28–30 hours after step-down losses.
Where can I buy quality 3.7V LiPo batteries in India?
Check Indian suppliers like Electro Global or other trusted electronics markets. Look for batteries with built-in PCM/BMS and clear ratings—don’t buy unbranded, no-spec batteries off the street.
What PCB design tips can improve battery life and safety for portable Pico systems?
Keep battery traces short and fat, put ceramic capacitors right on Pico’s supply pins, and use locking connectors. Always add a way to disconnect the battery and access the protection circuit for repairs or upgrades.
What’s the safest way to store LiPo batteries if my project won’t run for a long time?
Charge to about 3.8V per cell (storage voltage) and keep them cool and dry. Don’t store fully charged or totally empty—they can bloat, lose capacity, or even fail. Mark the last charge date for good measure.
Can I use a phone powerbank as a LiPo supply for my Pico project?
Yes, if it gives stable 5V output. You’ll still need a buck or LDO to get down to 3.3V for the Pico. It’s a handy hack for portable demos or testing, though not always the most efficient for long-term field use.
A 3000mAh 3.7V LiPo battery is a go-to solution for Raspberry Pi Pico builds. You get long runtimes, manageable size, and dependable performance. If you charge it properly, watch your PCB layout, and use batteries with built-in protection, your Pico project will just keep running—no surprises, no drama.
Whether it’s IoT sensors, recorders, or next-gen robots, the right battery tech is key to reliability in the field. LiPo advances—especially with 3000mah lipo battery class and above—are shaping embedded systems everywhere. Try solutions from Electro Global for batteries and power modules designed for hobbyists and pros alike. Worth remembering: Don’t skimp on batteries—your project depends on it.
Tagged
Related Content
From the Blog
- Optimize ESP32 Battery Life with a 3000mAh LiPo Battery
- Understanding and Managing Heating Issues in 3.7 V LiPo Battery Packs
- Choosing the Best 3.7 V LiPo Battery 2000mAh for Reliable DIY Electronics
- Complete LiPo Battery Safety Guide for Engineers and Hobbyists
- 3s LiPo Battery Capacity Explained for Electronics Projects